Disclosure: This article contains affiliate links. GameToolly may earn a commission if you purchase through qualifying links, at no additional cost to you.
Creating gaming content involves more than playing a game and pressing the record button. You need to choose video ideas, capture gameplay, edit footage, improve audio, create highlights, and publish content that viewers can discover.
Without a repeatable workflow, these tasks can become time-consuming. You might spend hours editing one video and have little time left to plan the next one.
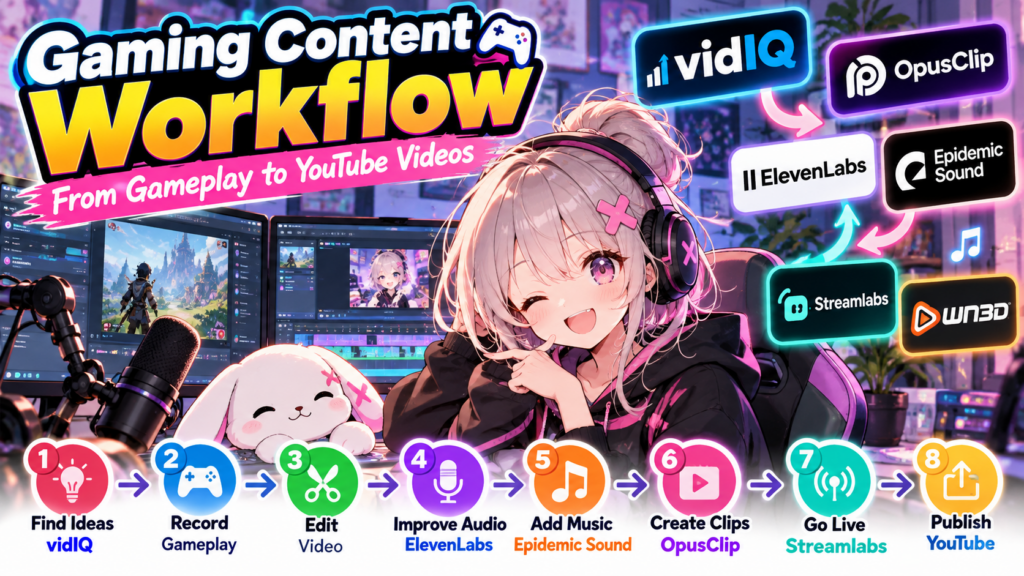
The solution is to build a simple gaming content workflow. In this guide, we’ll walk through the process from researching video ideas to publishing long-form videos and short clips, using tools that can help at different stages.
Step 1: Find Your Next Gaming Video Idea
Before recording, decide what your video is about and who it is for.
Gaming creators can explore several types of content:
- Beginner tutorials and guides
- Gameplay highlights and funny moments
- Character, weapon, or equipment comparisons
- Challenge videos
- Game updates and new features
- Tips for improving at competitive games
Try to make each video answer one clear question or deliver one specific experience. For example, instead of planning a general video about a game, consider a guide to a particular mechanic or a collection of the best moments from a recent session.
Use vidIQ to Research YouTube Topics
vidIQ offers YouTube-focused research tools that can help you explore keywords, related searches, and potential video topics.
Use keyword suggestions to compare ideas, but don’t choose a topic based on a score alone. Consider the competition, the audience you want to reach, and whether you can create a video that genuinely answers the viewer’s question.
For more detailed instructions, read our guide to using vidIQ for gaming YouTube keyword research.
Step 2: Record Gameplay with Editing in Mind
Once you have an idea, plan how you’ll capture the footage.
Before recording, check your game settings, microphone, recording resolution, and available storage. If you use a webcam or separate microphone recording, confirm that the files are being captured correctly.
Think about the final video while you play. If you’re recording a tutorial, capture the important steps clearly. If you’re collecting highlights, make a note of exciting moments so you can find them quickly during editing.
You don’t need to record every second of every session. Recording with a clear purpose can reduce the amount of footage you need to review later.
It’s also worth organizing files by project. Keep gameplay, commentary, music, and exported videos in clearly named folders so you can return to a project without searching through unrelated recordings.
Step 3: Edit the Main Video
The next step is turning raw footage into a video that viewers can follow.
Start with a rough cut. Remove unnecessary pauses, repeated sections, and footage that doesn’t contribute to the video’s purpose. Then organize the remaining clips into a logical sequence.
For a tutorial, make sure each step is easy to understand. For a gameplay montage, focus on pacing and the moments that make the video entertaining.
After the rough cut, review the audio. Your commentary should be clear, game audio should remain balanced, and background music shouldn’t compete with speech.
Add titles, captions, and visual effects only when they improve the experience. Too many transitions or animated elements can distract viewers from the gameplay.
If you’re looking for an AI-assisted way to create clips from longer recordings, you can also explore OpusClip.
Step 4: Improve Voiceovers and Commentary
Audio can make a major difference to the quality of gaming content. Clear commentary helps viewers understand your strategy, follow a tutorial, or connect with your personality.
If you record your own voice, choose a quiet environment and check microphone levels before starting. Removing avoidable background noise during recording is usually easier than trying to fix a poor recording later.
Consider ElevenLabs for AI Voiceovers
ElevenLabs provides AI voice-generation tools that creators can use for narration and other voiceover tasks.
It may be useful when you need narration for a tutorial, an introduction, or a video that doesn’t rely on live commentary. You can write a script, generate a voiceover, and then synchronize it with the visuals during editing.
Review the pronunciation of game names, character names, and gaming terminology before publishing. Also check the current plan terms and the permissions applicable to your intended use.
Learn more in our guide to using ElevenLabs for gaming content and AI voiceovers.
Step 5: Choose Music You Can Use
Music can help establish the mood of a gaming video, but you need to consider licensing before publishing.
A song being available online doesn’t automatically mean you can use it in a monetized YouTube video or a livestream. Review the terms for the music source, your subscription, and the platform where you intend to publish.
Use Epidemic Sound to Explore Licensed Music
Epidemic Sound offers a music and sound-effects library for creators. You can explore tracks that fit different styles of gaming content, from energetic montages to relaxed gameplay.
When selecting music, consider the pacing of the video and the balance between the soundtrack and the original game audio.
Before publishing, verify the current licensing terms, eligible platforms, and any requirements for connecting or registering your channels. Don’t assume that every track or subscription automatically covers every use.
Read our guide to copyright-safe music for gaming videos for more information.
Step 6: Turn Long Videos into Short Clips
One recording can sometimes support several pieces of content.
For example, a full gameplay video might contain a funny reaction, an impressive play, or a useful tip that works as a standalone short clip. Reusing these moments can help you create additional content without recording an entirely new session.
Look for moments that make sense without a long introduction. Trim unnecessary lead-in footage and make sure viewers understand what is happening.
If you convert a landscape video into a vertical format, check the framing carefully. Important gameplay details, subtitles, and faces should remain visible.
OpusClip can help creators turn longer videos into shorter clips using AI-assisted workflows. Review the generated clips before publishing because automated tools may miss context or select a moment that doesn’t work well on its own.
You can also compare different approaches in our guide to tools for turning gaming streams into Shorts.
Step 7: Prepare Your Streaming Setup
If you also livestream, keep your streaming workflow organized separately from your video-editing process.
Tools such as Streamlabs can support livestreaming workflows, while OWN3D offers overlays and other visual assets for stream presentation.
When setting up a stream, check your microphone, game capture, alerts, and scene transitions before going live. Make sure overlays don’t obscure important gameplay information.
Keep your visual style consistent across your livestreams, YouTube videos, and other social channels. A recognizable layout can make your content feel more cohesive, but clarity should come before decoration.
You can learn more in our existing guides to Streamlabs and OWN3D.
Step 8: Publish, Review, and Improve
Once your video is ready, write a clear title and description that accurately represent the content. Use a thumbnail that communicates the main idea without making misleading promises.
After publishing, review the available analytics. Look at views, audience retention, traffic sources, and search queries when the data is available.
Use those findings to decide what to improve next. If viewers leave early, review the introduction and pacing. If a particular tutorial attracts interest, consider creating a related follow-up video.
Results take time, and no tool can guarantee views or channel growth. The goal is to develop a repeatable process and use real audience feedback to improve it.
A Simple Weekly Workflow for Gaming Creators
If you’re unsure how to organize your work, start with a manageable schedule.
- Day 1: Research topics and choose one video idea.
- Day 2: Record gameplay and commentary.
- Day 3: Edit the main video and improve audio.
- Day 4: Create a thumbnail, prepare metadata, and publish.
- Day 5: Extract useful highlights and prepare short clips.
- Day 6: Review performance and collect ideas for the next video.
- Day 7: Take a break or prepare footage for the following week.
Treat this as a starting point, not a strict rule. Adjust it to your available time and the complexity of your videos.
Final Thoughts
A productive gaming content workflow doesn’t require using every tool available. Start with a clear topic, record with a purpose, edit for clarity, and publish content that serves your audience.
Tools such as vidIQ, ElevenLabs, Epidemic Sound, and OpusClip can support different parts of the process. Streaming tools and visual assets can help you maintain a consistent presentation when you go live.
Choose the tools that solve real problems in your workflow, review their current features and pricing, and improve your process one step at a time.
Affiliate disclosure: GameToolly may earn a commission from qualifying purchases made through affiliate links in this article, at no additional cost to you.