If you stream on Twitch, you already create content that could reach a much larger audience. The problem is that most viewers will never watch an entire three-hour livestream just to discover your best moments.
That is where YouTube Shorts comes in.
By turning your Twitch streams into short, vertical videos, you can share funny reactions, impressive gameplay, memorable fails, and useful tips with people who have never visited your Twitch channel.
The good news? You do not need to edit every clip from scratch. With a simple workflow and AI-powered tools, you can turn existing streams into short-form content without spending hours editing.
In this guide, you will learn how to find the best moments, create YouTube Shorts from Twitch VODs, add captions, and use short-form videos to attract new viewers.
Why Turn Twitch Streams into YouTube Shorts?
Streaming live is excellent for building a community, but it can be difficult to reach new viewers through livestreams alone. Short-form videos give your content another way to be discovered.
Here are three reasons to repurpose your Twitch streams.
1. Reach viewers who do not watch livestreams
Some people prefer watching videos that are less than a minute long. A well-edited Short can introduce your personality and gameplay without asking viewers to commit to a full stream.
2. Get more value from every stream
You have already invested time in streaming. Instead of letting your best moments disappear into a long VOD, you can reuse them across multiple videos.
3. Give viewers a reason to visit your Twitch channel
A funny clip or impressive play can encourage viewers to explore your other content. Make your channel name easy to find and give people a clear reason to watch more.
Remember that views do not automatically translate into Twitch followers. Your clips should be entertaining on their own while making it easy for interested viewers to discover your channel.
What You Need to Get Started
You do not need an expensive editing setup. Start with these essentials:
- A Twitch VOD: A saved livestream or recording that contains moments worth sharing.
- A clipping or editing tool: Use it to select highlights, crop footage vertically, and prepare your video.
- Captions: Subtitles can help viewers follow dialogue, reactions, and commentary.
- A YouTube channel: You will need a channel where you can upload Shorts.
- A repeatable workflow: A simple process makes it easier to publish consistently.
You can edit clips manually with a video editor, or use an AI tool to speed up highlight discovery and vertical-video creation.
Method 1: Use AI to Create Shorts Faster
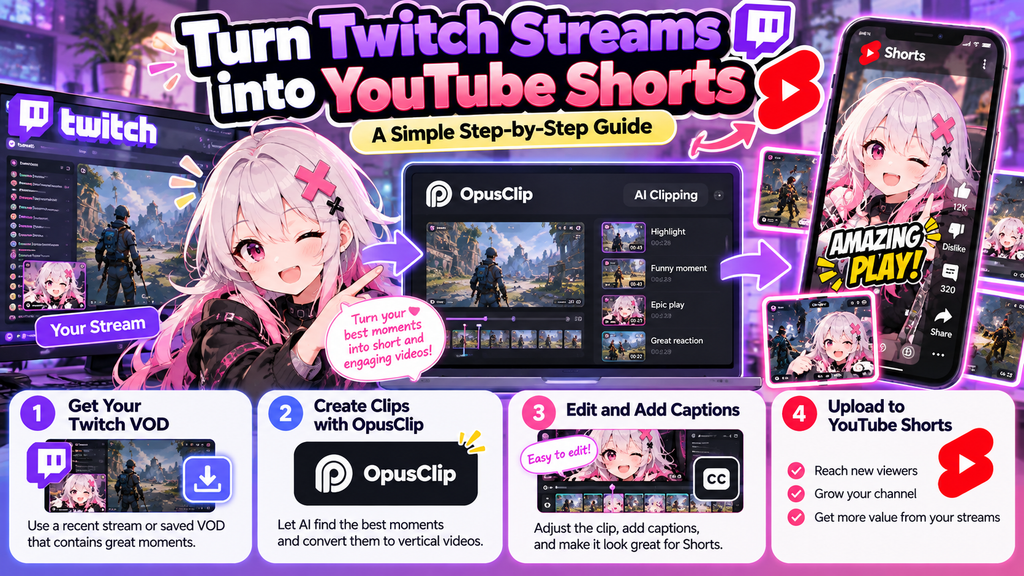
If you regularly stream for several hours, manually reviewing every minute of footage can become tedious. An AI clipping tool can help you identify potential highlights and prepare them for short-form platforms.
One option is OpusClip, which is designed to turn longer videos into shorter clips.
Try OpusClip: Get started with OpusClip
Here is a beginner-friendly workflow.
Step 1: Choose a Twitch VOD
Start with a stream that contains plenty of interaction, exciting gameplay, funny reactions, or useful commentary.
If your Twitch VOD is not available, check your recording settings and any local recordings you saved. Availability and import options can vary by platform and tool.
Step 2: Import your video
Open your chosen clipping tool and follow its current instructions for uploading or importing the recording.
For your first attempt, choose a manageable section of a stream rather than processing your entire content archive. This makes it easier to evaluate the results.
Step 3: Generate potential highlights
Let the tool analyze the footage if its current features support AI highlight detection. Review the suggested clips rather than assuming every automatically selected moment is worth publishing.
Gaming highlights often work best when they have a clear payoff, such as:
- An unexpected victory or comeback
- A funny mistake or reaction
- A surprising in-game event
- A useful strategy or quick tutorial
- A memorable interaction with teammates
The strongest moment is not always the one with the most action. Context and personality can make a simple moment entertaining.
Step 4: Convert the clip to a vertical format
YouTube Shorts are designed for vertical viewing. A vertical 9:16 layout is a useful starting point for gaming clips.
Check the crop carefully. Make sure viewers can see the important gameplay details, and keep your facecam visible if it adds value.
For games with a busy interface, you may need to adjust the framing manually. An automatic crop can occasionally hide important information.
Step 5: Add and review captions
Captions help viewers follow commentary, especially when they watch without sound.
Review automatically generated subtitles for misspelled names, gaming terminology, and character names. Correct any errors before publishing.
Keep captions readable and avoid placing them over important gameplay information or the main action.
Step 6: Preview and export
Watch the entire clip before exporting it. Check the beginning, middle, and ending to make sure the moment makes sense without the rest of the stream.
If the video starts too slowly, trim the introduction. If the payoff is cut off, extend the ending.
Export using a vertical format and resolution supported by YouTube’s current upload requirements.
Method 2: Create Shorts Manually
AI tools are convenient, but manual editing can be a good choice if you want complete control or prefer not to pay for another service.
Step 1: Find a strong moment
Review your VOD and note the timestamps of exciting, funny, or informative moments. You can also use clips you have already created.
Choose one main idea for each video. A single clear moment is usually easier to follow than several unrelated events.
Step 2: Trim the footage
Open your recording in a video editor and remove unnecessary pauses, long introductions, and unrelated gameplay.
Start close to the interesting moment, but leave enough context for viewers to understand what is happening.
Step 3: Create a vertical layout
Set up a vertical project. Depending on the game, you can crop the gameplay, place it above a facecam, or use a layout that keeps the important parts of the original footage visible.
Avoid shrinking the gameplay so much that text and interface elements become difficult to read on a phone.
Step 4: Add captions and sound
Add subtitles where they improve understanding. Balance the volume of game audio, commentary, and any additional sound.
Only use music and audio that you have permission to publish. Music permitted during a Twitch livestream is not necessarily cleared for reuse in a YouTube video.
Step 5: Export and upload
Preview the final video on a small screen if possible. Check for awkward cuts, unreadable text, black bars, and audio issues before uploading it to YouTube.
Manual editing takes more time at first, but saving a reusable project template can speed up future videos.
How to Make Twitch Clips More Engaging
Creating a Short is only the first step. The way you present the moment can influence whether viewers keep watching.
Hook viewers quickly
Avoid long introductions. Start with the moment that makes someone curious, then provide enough context to understand it.
For example, instead of opening with several seconds of ordinary gameplay, begin just before a surprising play or reaction.
Focus on one idea
A Short should have a clear purpose. Trying to fit an entire match into one video can make it difficult for viewers to follow.
Create separate clips for separate highlights. This also gives you more opportunities to test different types of content.
Make captions easy to read
Use short phrases, sensible line breaks, and sufficient contrast. Do not cover important game elements with oversized text.
Give the ending a purpose
A clip can end with the payoff, a funny reaction, or a concise conclusion. Avoid adding a long outro that makes viewers wait for the video to finish.
If you want viewers to find your Twitch channel, use a subtle channel name or a short call to action when it fits naturally.
A Simple Weekly Workflow for Streamers
You do not need to upload a Short after every stream. Start with a manageable routine and adjust it to your schedule.
| Stage | What to do |
|---|---|
| After streaming | Save the VOD and note memorable moments |
| Clip selection | Pick two or three promising highlights |
| Editing | Crop, trim, caption, and review each clip |
| Publishing | Upload with a clear title and relevant description |
| Review | Check which videos attracted views and engagement |
Treat this as a starting workflow, not a guaranteed growth formula. Experiment with different highlights and review the results over time.
If you already use Streamlabs as part of your streaming setup, see our guide to using Streamlabs for gaming for more help with your streaming workflow.
Common Mistakes to Avoid
Uploading clips without reviewing them. AI can miss context, crop the wrong area, or generate incorrect captions. Always watch the final video before publishing.
Making every clip too long. Include enough context for the moment to make sense, but remove anything that does not contribute to the story.
Ignoring copyright. Make sure you have the necessary rights to use gameplay footage, music, sound effects, and any third-party material. Check the relevant platform rules before publishing.
Expecting instant growth. Some videos will perform better than others. Use your results to learn which moments appeal to your audience instead of judging your strategy by one upload.
Forgetting the original audience. Short-form videos should represent your personality and content accurately. Avoid misleading titles or edits that promise something the clip does not deliver.
Frequently Asked Questions
Can I turn any Twitch stream into a YouTube Short?
You can use suitable footage from your streams, provided you have the necessary rights and permissions. Check for copyrighted music, third-party content, and any applicable platform rules before uploading.
Do I need AI to make YouTube Shorts?
No. You can create Shorts manually with a video editor. AI tools can reduce some editing work, particularly when you need to find highlights or produce multiple clips.
How long should a gaming Short be?
Choose a length that fits the moment. A short, focused clip can work well when it communicates the idea quickly, while a more complex play may need additional context. Check YouTube’s current Shorts requirements before publishing.
Should I upload the same clip to multiple platforms?
You can adapt suitable clips for other platforms, but check each platform’s format, music rules, and content policies. Review the final version on each platform rather than assuming one export will work perfectly everywhere.
Is OpusClip worth trying for gaming content?
It may be useful if you regularly produce long recordings and want help preparing short clips. Test it with a few streams first and evaluate the highlight quality, cropping, caption accuracy, and time saved before deciding whether a paid plan makes sense.
Final Thoughts
Turning Twitch streams into YouTube Shorts is a practical way to give your existing content more opportunities to reach new viewers.
Start by selecting a strong moment, then trim the footage, create a vertical layout, review the captions, and publish a polished clip. You can do this manually or use a tool such as OpusClip to help speed up parts of the process.
The most important thing is to build a workflow you can maintain. Experiment with different types of highlights, learn from your results, and keep improving your videos over time.
Ready to repurpose your streams? Try OpusClip and see whether AI-assisted clipping fits your workflow.
Disclosure: GameToolly may earn a commission if you purchase through qualifying affiliate links. This does not affect the price you pay.